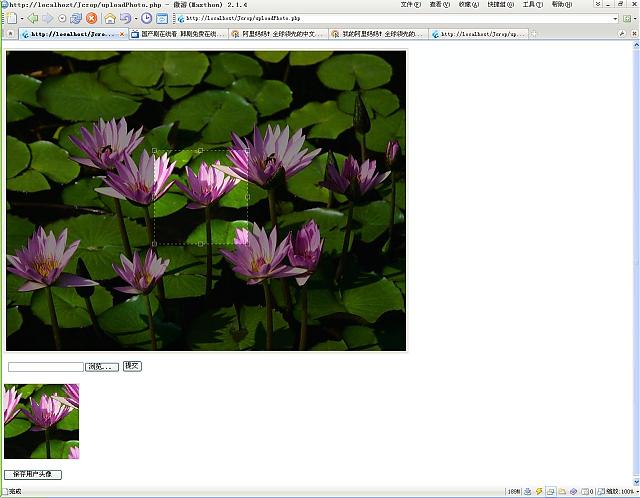
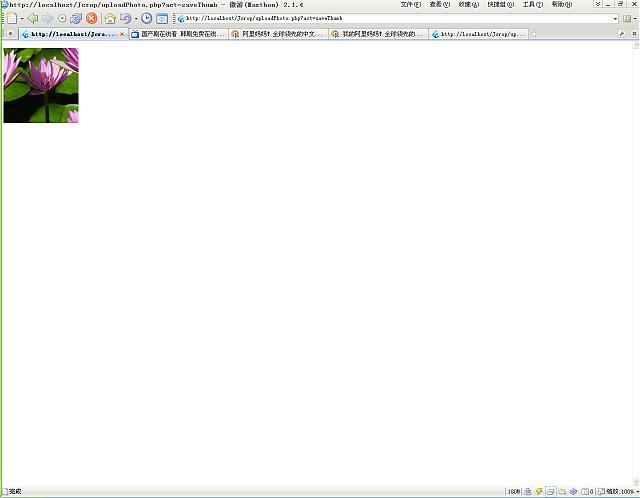
jquery使用Jcrop插件轻松实现上传图片后选取区域做头像
一般网站上传头像部分会比较麻烦,如果完全程序控制的话,程序把上传的图片自动裁切成指定大小的头像的话,很有可能会破坏头像的整体美观。所以现在大多数web2.0网站都有用js或flash来实现头像的上传与选取!
现在用jquery加上jcrop插件的话,就可以非常简单的实现这些功能!如果再加上编写的一些ajax处理部分的话就基本上可以满足一般web2.0的使用要求了
PHP代码
- <?php
- if($_GET[‘act’]==‘saveThumb’){
- $targ_w = $targ_h = 150;
- $jpeg_quality = 100;
- $src = $_POST[‘bigImage’];
- $img_r = imagecreatefromjpeg($src);
- $dst_r = ImageCreateTrueColor( $targ_w, $targ_h );
- imagecopyresampled($dst_r,$img_r,0,0,$_POST[‘x’],$_POST[‘y’],$targ_w,$targ_h,$_POST[‘w’],$_POST[‘h’]);
- header(‘Content-type: image/jpeg’);
- imagejpeg($dst_r,null,$jpeg_quality);
- exit;
- }
- ?>
- <html>
- <head>
- <script src="jquery.pack.js"></script>
- <script src="jquery.Jcrop.pack.js"></script>
- <link rel="stylesheet" href="jquery.Jcrop.css" type="text/css" />
- <script language="Javascript">
- $(function(){
- });
- function goss(){
- jQuery(‘#cropbox’).Jcrop({
- onChange: showPreview,
- onSelect: showPreview,
- onSelect: updateCoords,
- aspectRatio: 1
- });
- }
- function updateCoords(c)
- {
- $(‘#x’).val(c.x);
- $(‘#y’).val(c.y);
- $(‘#w’).val(c.w);
- $(‘#h’).val(c.h);
- };
- function checkCoords()
- {
- if ($(‘#x’).val()==”){
- alert(‘请先上传头像然后选择裁切头像最后进行保存!’);
- return false;
- }
- };
- function showPreview(coords)
- {
- var rx = 150 / coords.w;
- var ry = 150 / coords.h;
- var w2=$("#bigwidth").val();
- var h2=$("#bigheight").val();
- jQuery(‘#preview’).css({
- width: Math.round(rx * w2) + ‘px’,
- height: Math.round(ry * h2) + ‘px’,
- marginLeft: ‘-‘ + Math.round(rx * coords.x) + ‘px’,
- marginTop: ‘-‘ + Math.round(ry * coords.y) + ‘px’
- });
- }
- </script>
- </head>
- <body>
- <?php
- if($_GET[‘act’]==‘upload’){
- if($_POST[‘upload’]==‘upload’){
- $uploaddir =‘upload/’;
- $uploadfile = $uploaddir . basename($_FILES[‘file’][‘name’]);
- //print_r($_FILES[‘file’]);
- //echo $uploadfile;
- if (move_uploaded_file($_FILES[‘file’][‘tmp_name’], $uploadfile)) {
- list($w, $h, $type, $attr)=getimagesize($uploadfile);
- $str=”;
- if($w>550){
- $str="width:550px;";
- }
- if($h>550){
- $str.=" height:550px;";
- }
- $str=emptyempty($str)?”:"style=’ ".$str." ‘";
- $f1="<img src=’$uploadfile’ border=0 $str id=’cropbox’ >";
- $f2="<img src=’$uploadfile’ border=0 $str id=’preview’ >";
- echo ‘<script language="javascript">parent.$("#showBig").html("’.$f1.‘");parent.$("#showThumb").html("’.$f2.‘");parent.goss();parent.$("#bigwidth").val("’.$w.‘");parent.$("#bigheight").val("’.$h.‘");parent.$("#bigImage").val("’.$uploadfile.‘");</script>’;
- }else {
- echo "<script>alert(‘文件上传失败!’);</script>";
- }
- }
- ?>
- <div style="margin:0px;font-size:12px;">
- <FORM ACTION="?act=upload" METHOD=POST enctype="multipart/form-data">
- <input type="file" name="file" id="file" />
- <input type="submit" name="button" id="button" value="提交" />
- <input name="upload" type="hidden" id="upload" value="upload" /><input type="hidden" name="MAX_FILE_SIZE" value="3000000" />
- </FORM>
- </div>
- <?php
- exit;
- }
- ?>
- <div id="showBig" style="width:500px;height:500px;border:2px solid #E6E0CE;padding:3px;"></div>
- <iframe style="width:500px;height:60px;padding:0px;" src="?act=upload"></iframe>
- <div id="showThumb" style="width:152px;height:152px;border:1px solid #cccccc;padding:1px; overflow: hidden;"></div>
- <div style="margin-top:20px;">
- <form action="?act=saveThumb" method="post" onsubmit="return checkCoords();">
- <input type="hidden" id="bigImage" name="bigImage" />
- <input type="hidden" id="bigwidth" name="bigwidth" />
- <input type="hidden" id="bigheight" name="bigheight" />
- <input type="hidden" id="x" name="x" />
- <input type="hidden" id="y" name="y" />
- <input type="hidden" id="w" name="w" />
- <input type="hidden" id="h" name="h" />
- <input type="submit" value="保存用户头像" />
- </form>
- </div>
- </body>
- </html>


你好 请问你 这代码的 裁剪完的图片保存在哪里?
能 发一份么 谢谢 dl_4537_lfq@sina.com
谢谢分享
您好,
很荣幸看到您的blog 特别是这篇文章,于是根据您的代码学习.
但由于刚刚接触php不久,有一些地方不是很明白,不知道您有时间可以解答下吗? 以一颗真诚的求学的心向您请教,希望能等到您的解答邮件
当我用imagejpeg($dst_r,$src,$jpeg_quality); 替代imagejpeg($dst_r,null,$jpeg_quality); 之后,
缩略图保存到了指定的文件夹,但是在新弹出的页面中以照片的形式显示http://localhost/thumb/thumb.php?act=saveThumb
这是什么原因呢?看了很久代码也查阅了很多手册,还是不明白.如何在保存完照片后不要跳转到此页面的呢?
注意php输出的header,然后不要输出图片就行了,直接输入一段文字,说保存成功不就得了“
Parse error: syntax error, unexpected T_STRING, expecting ‘,’ or ‘;’ in D:\PHPnow\htdocs\userpic.php on line 140
对应的代码,请问怎么回事啊
echo “”.parent.$(“#showBig”).html(“’.$f1.‘”);parent.$(“#showThumb”).html(“’.$f2.‘”);parent.goss();parent.$(“#bigwidth”).val(“’.$w.‘”);parent.$(“#bigheight”).val(“’.$h.‘”);parent.$(“#bigImage”).val(“’.$uploadfile.‘”).””;
注意引号全角半角的问题。在网上复制代码也得自己检查检查啊!