作者归档:℃冻番茄

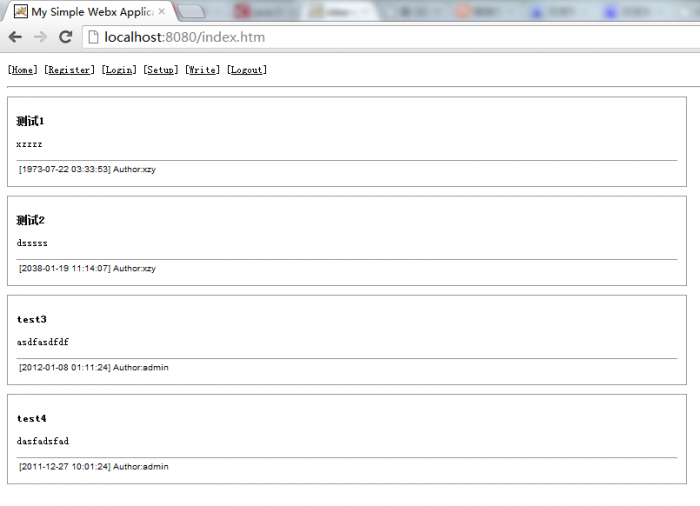
spring整合memcache,webx采用memcache存储session

记录些今天倒腾的东西

1、 搜索maven库,搜索出自己想要的库的groupid等信息

http://mvnrepository.com/

2、 spring下面整合memcache

memcache的java客户端选用的是xmemcache,可以在maven中心库中直接搜索到并使用

[codesyntax lang=”xml”]

	<bean name="memcachedClient" class="net.rubyeye.xmemcached.utils.XMemcachedClientFactoryBean">
		<property name="servers">
			<value>127.0.0.1:11211</value>
		</property>
	</bean>

[/codesyntax]

这样就可以在程序中使用MemcachedClient连接类了

[codesyntax lang=”java”]

public class Index {

	@Autowired
	private MemcachedClient memcachedClient;

	public void execute(Context context) {

		try {
			WebSiteDO web = new WebSiteDO();
			memcachedClient.set("test111", 30, web);
			WebSiteDO webCache = memcachedClient.get("test111");
			System.out.println(webCache.getImagesPath());
		} catch (TimeoutException e) {
			// TODO Auto-generated catch block
			e.printStackTrace();
		} catch (InterruptedException e) {
			// TODO Auto-generated catch block
			e.printStackTrace();
		} catch (MemcachedException e) {
			// TODO Auto-generated catch block
			e.printStackTrace();
		}
    }
}

[/codesyntax]

3、webx中使用memcache来存储session

修改webx.xml中的session部分

[codesyntax lang=”xml”]

 	<session>
            <id>
                <cookie path="/" maxAge="2048" httpOnly="true" />
            </id>
           <stores>
			    <session-stores:store id="simple" class="cn.yundev.xzy.common.MemCacheSession"/> 
			</stores>
            <store-mappings>
                <match name="*" store="simple" />
            </store-mappings>
        </session>

[/codesyntax]

扩展session只需要继承接口SessionStore接口

[codesyntax lang=”java”]

public class MemCacheSession implements SessionStore {

	private MemcachedClient memcachedClient;

	public void init(String storeName, SessionConfig sessionConfig) throws Exception {
		ApplicationContext atx = new ClassPathXmlApplicationContext("xmemcache.xml");
		memcachedClient = (MemcachedClient) atx.getBean("memcachedClient");
	}

	public Iterable<String> getAttributeNames(String sessionID,
			StoreContext storeContext) {
		try {
			SessionDO session = memcachedClient.get(sessionID);
			if (session == null) {
				return emptyList();
			} else {
				return session.getSessionData().keySet();
			}
		} catch (TimeoutException e) {
			e.printStackTrace();
		} catch (InterruptedException e) {
			e.printStackTrace();
		} catch (MemcachedException e) {
			e.printStackTrace();
		}
		return null;
	}

	public Object loadAttribute(String attrName, String sessionID,
			StoreContext storeContext) {
		try {
			SessionDO session = memcachedClient.get(sessionID);
			if (session != null) {
				Map<String, Object> sessionData = session.getSessionData();
				return sessionData.get(attrName);
			}
		} catch (TimeoutException e) {
			e.printStackTrace();
		} catch (InterruptedException e) {
			e.printStackTrace();
		} catch (MemcachedException e) {
			e.printStackTrace();
		}
		return null;
	}

	public void invaldiate(String sessionID, StoreContext storeContext) {
		try {
			memcachedClient.delete(sessionID);
		} catch (TimeoutException e) {
			e.printStackTrace();
		} catch (InterruptedException e) {
			e.printStackTrace();
		} catch (MemcachedException e) {
			e.printStackTrace();
		}
	}

	public void commit(Map<String, Object> attrs, String sessionID,
			StoreContext storeContext) {
		Map<String, Object> sessionData = new HashMap<String, Object>();
		try {
			SessionDO session = memcachedClient.get(sessionID);
			if (session != null) {
				sessionData = session.getSessionData();
			}

			for (Map.Entry<String, Object> entry : attrs.entrySet()) {
				String attrName = entry.getKey();
				Object attrValue = entry.getValue();

				if (attrValue == null) {
					sessionData.remove(attrName);
				} else {
					sessionData.put(attrName, attrValue);
				}
			}
			SessionDO sessionDO = new SessionDO();
			sessionDO.setSessionData(sessionData);
			boolean r = memcachedClient.set(sessionID, 1200, sessionDO);
			System.out.println(r);

		} catch (TimeoutException e) {
			e.printStackTrace();
		} catch (InterruptedException e) {
			e.printStackTrace();
		} catch (MemcachedException e) {
			e.printStackTrace();
		}

	}

}

[/codesyntax]

velocity基本语法

1、声明:#set ($var=XXX)
左边可以是以下的内容
Variable reference
String literal
Property reference
Method reference
Number literal #set ($i=1)
ArrayList #set ($arr=[“yt1″,”t2”])
算术运算符

2、注释:
单行## XXX
多行#* xxx
xxxx
xxxxxxxxxxxx*#

References 引用的类型
3、变量 Variables
以 “$” 开头,第一个字符必须为字母。character followed by a VTL Identifier. (a .. z or A .. Z).
变量可以包含的字符有以下内容:
alphabetic (a .. z, A .. Z)
numeric (0 .. 9)
hyphen (“-“)
underscore (“_”)

4、Properties
$Identifier.Identifier
$user.name
hashtable user中的的name值.类似:user.get(“name”)

5、Methods
object user.getName() = $user.getName()

6、Formal Reference Notation
用{}把变量名跟字符串分开


#set ($user=”csy”}
${user}name
返回csyname

$username
$!username
$与$!的区别
当找不到username的时候,$username返回字符串”$username”,而$!username返回空字符串””

7、双引号 与 引号
#set ($var=”helo”)
test”$var” 返回testhello
test’$var’ 返回test’$var’
可以通过设置 stringliterals.interpolate=false改变默认处理方式

8、条件语句
#if( $foo )
<strong>Velocity!</strong>
#end
#if($foo)
#elseif()
#else
#end
当$foo为null或为Boolean对象的false值执行.

9、逻辑运算符:== && || !

10、循环语句#foreach($var in $arrays ) // 集合包含下面三种Vector, a Hashtable or an Array
#end
#foreach( $product in $allProducts )
<li>$product</li>
#end

#foreach( $key in $allProducts.keySet() )
<li>Key: $key -> Value: $allProducts.get($key)</li>
#end

#foreach( $customer in $customerList )
<tr><td>$velocityCount</td><td>$customer.Name</td></tr>
#end

11、velocityCount变量在配置文件中定义
# Default name of the loop counter
# variable reference.
directive.foreach.counter.name = velocityCount
# Default starting value of the loop
# counter variable reference.
directive.foreach.counter.initial.value = 1

12、包含文件
#include( “one.gif”,”two.txt”,”three.htm” )

13、Parse导入脚本
#parse(“me.vm” )

14、#stop 停止执行并返回

15、定义宏Velocimacros ,相当于函数 支持包含功能
#macro( d )
<tr><td></td></tr>
#end
调用
#d()

16、带参数的宏
#macro( tablerows $color $somelist )
#foreach( $something in $somelist )
<tr><td bgcolor=$color>$something</td></tr>
#end
#end

17、Range Operator
#foreach( $foo in [1..5] )

学习java之使用jdbc操作mysql

需要用到mysql for java驱动 mysql-connector-java-5.1.22.tar.gz

下载地址 http://dev.mysql.com/downloads/connector/j/

mysql-connector-java.jar 导入到项目

[codesyntax lang=”java”]

import java.sql.Connection;
import java.sql.DriverManager;
import java.sql.ResultSet;
import java.sql.SQLException;
import java.sql.Statement;

public class testdb {

	static Connection conn = null;

	public static void main(String[] args) {
		testdb testdb = new testdb();
		testdb.test();
	}

	public static void getConnectionByJDBC() {
		try {
			Class.forName("com.mysql.jdbc.Driver");
		} catch (ClassNotFoundException e) {
			System.out.println("装载驱动包出现异常,请查正!");
			e.printStackTrace();
		}
		try {
			conn = DriverManager.getConnection("jdbc:mysql://192.168.56.101/ye55", "root", "root");
		} catch (SQLException e) {
			System.out.println("链接数据库发生异常!");
			e.printStackTrace();
		}
	}

	public void test() {
		String sql = "select * from user";
		getConnectionByJDBC();
		try {
			Statement stmt = conn.createStatement();
			ResultSet rs = stmt.executeQuery(sql);
			while (rs.next()) {
				String username = rs.getString("username");
				String password = rs.getString("password");
				System.out.println(username + " --" + password);
			}
		} catch (SQLException e) {
			System.out.println(e.getMessage());
			e.printStackTrace();
		} finally {
			try {
				if (conn != null)
				conn.close();
			} catch (SQLException e) {
				System.out.println(e.getMessage());
				e.printStackTrace();
			}
		}
	}
}

[/codesyntax]

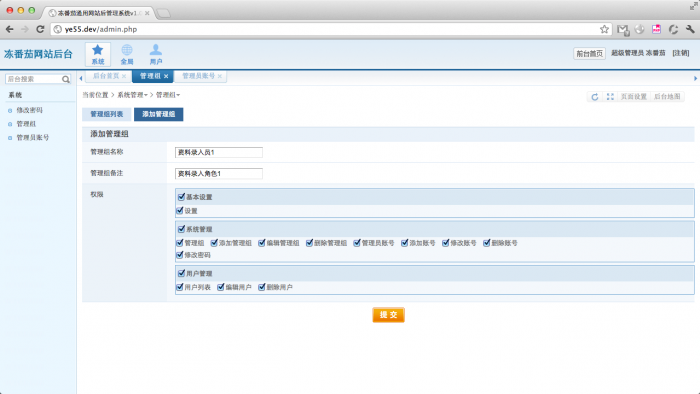
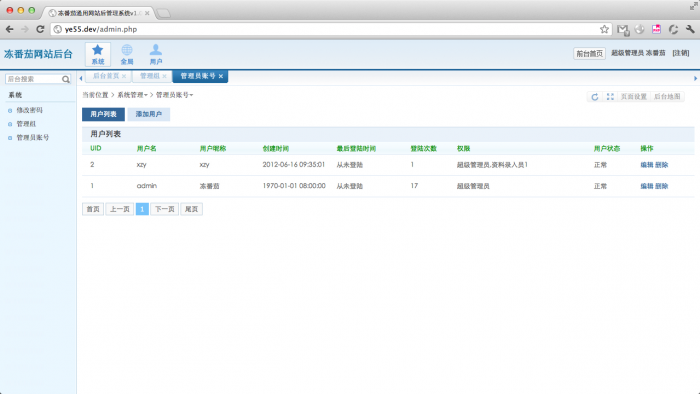
开发一套新的基础后台管理

很久没自己折腾了,准备自己做个淘宝客网站,所以先整好框架和基础后台程序

这套后台是从PHPWind8.7的后台里扒下来的,非常喜欢它的风格和Tab标签形式的内容窗体

MVC框架第三版

后台的主要功能:

权限控制,同一用户可选择多个管理组,权限合并

后台菜单显示与用户的权限有关

mac os x redis安装后随机启动

在目录 ~/Library/LaunchAgents 下新建redis.plist文件

[codesyntax lang=”xml”]

<?xml version="1.0" encoding="UTF-8"?>
<!DOCTYPE plist PUBLIC "-//Apple//DTD PLIST 1.0//EN" "http://www.apple.com/DTDs/PropertyList-1.0.dtd">
<plist version="1.0">
<dict>
        <key>Label</key>
        <string>com.redis</string>
        <key>RunAtLoad</key>
        <true/>
        <key>ProgramArguments</key>
        <array>
                <string>/usr/local/bin/redis-server</string>
                <string>/usr/local/etc/redis.conf</string>
        </array>
</dict>
</plist>

[/codesyntax]


launchctl load ~/Library/LaunchAgents/redis.plist
launchctl start com.redis


同理,memcached,nginx都这么随机启动

CentOS 下SSH无密码登录的配置

CentOS 下SSH无密码登录的配置

最近学习Hadoop。它要求各节点之间通过SSH无密码登录,配置SSH的时候费了一番功夫,记录下来,以备忘。
配置SSH无密码登录需要3步:
1.生成公钥和私钥
2.导入公钥到认证文件,更改权限
3.测试

1.生成公钥和私钥

Shell代码
ssh-keygen -t rsa

默认在 ~/.ssh目录生成两个文件:
id_rsa :私钥
id_rsa.pub :公钥
2.导入公钥到认证文件,更改权限
2.1 导入本机
Shell代码
cat ~/.ssh/id_rsa.pub >> ~/.ssh/authorized_keys

2.2 导入要免密码登录的服务器
首先将公钥复制到服务器
Shell代码
scp ~/.ssh/id_rsa.pub xxx@host:/home/xxx/id_rsa.pub

然后,将公钥导入到认证文件,这一步的操作在服务器上进行
Shell代码
cat ~/is_rsa.pub >> ~/.ssh/authorized_keys

2.3 在服务器上更改权限

Shell代码
chmod 700 ~/.ssh
Shell代码
chmod 600 ~/.ssh/authorized_keys

3.测试
ssh host,第一次登录可能需要yes确认,之后就可以直接登录了

在ubuntu12.04部署hadoop1.0.3单机环境

这几天刚接触Hadoop,在学习如何搭建一个Hadoop集群。在这分享一下,最新版的 ubuntu12.04 + hadoop1.0.3

hadoop下载 【renren的国内镜像,速度比较快】
http://labs.renren.com/apache-mirror//hadoop/core/

ubuntu12.04(64bit)安装java运行环境
sudo apt-get install openjdk-6-jdk
最终安装位置为 /usr/lib/jvm/java-6-openjdk-amd64 [64位,如果不是64位系统,请进目录查找]

下载hadoop后,解压到/home 目录下

hadoop的目录为 /home/hadoop-1.0.3

修改一下hadoop的目录拥有者(xzy为指定的linux用户账号)
sudo chown xzy:xzy hadoop-1.0.3 -R

cd hadoop-1.0.3

vim conf/hadoop-env.sh
找到下面一行,去除注释,把jdk的路径写上
# export JAVA_HOME=/usr/lib/j2sdk1.5-sun
export JAVA_HOME=/usr/lib/jvm/java-6-openjdk-amd64

验证hadoop是否安装成功
bin/hadoop version
Hadoop 1.0.3
Subversion https://svn.apache.org/repos/asf/hadoop/common/branches/branch-1.0 -r 1335192
Compiled by hortonfo on Tue May 8 20:31:25 UTC 2012
From source with checksum e6b0c1e23dcf76907c5fecb4b832f3be

最后一步,运行一个demo任务WordCount
mkdir input
cp conf/* input
bin/hadoop jar hadoop-examples-1.0.3.jar wordcount input output
cat output/*

shell编写简单的守护进程

[codesyntax lang=”bash”]

#!/bin/sh
PRO_PATH=”/home/sh”
PROGRAM=”rediscache.sh”

while true ; do
PRO_NOW=`ps aux | grep $PROGRAM | grep -v grep | wc -l`

if [ $PRO_NOW -lt 3 ]; then
#echo “exec $PROGRAM”
$PRO_PATH/$PROGRAM 2>/dev/null 1>&2 &
fi

PRO_STAT=`ps aux|grep $PROGRAM |grep T|grep -v grep|wc -l`

if [ $PRO_STAT -gt 0 ] ; then
killall -9 $PROGRAM
./$PROGRAM 2>/dev/null 1>&2 &
fi
sleep 2
done
exit 0

[/codesyntax]